
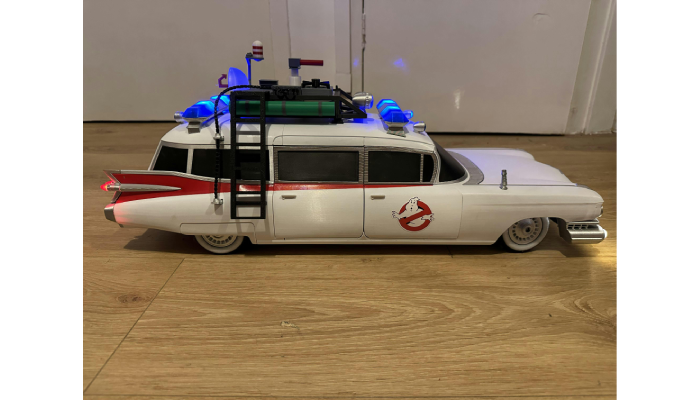
If you’ve ever been a fan of Ghostbusters, you’ve likely fallen in love with the unmistakable and thrilling Ecto 1 siren. It’s loud, unique, and full of nostalgia — and for car enthusiasts, installing one in their own vehicle can be a dream come true. Whether you’re looking to make a statement at a car show, participate in a parade, or simply add a cool touch to your ride, wiring an Ecto 1 siren for car is a fun yet technical project.
This guide will walk you through everything you need to know — from understanding the siren’s components to installing and wiring it properly for safe and functional use.
1. What is an Ecto 1 Siren?
The Ecto 1 siren is the signature wailing sound used in the Ghostbusters movies, specifically from the 1959 Cadillac Miller-Meteor ambulance that served as the Ghostbusters’ vehicle. The sound is high-pitched, warbling, and instantly recognizable.
Modern replicas are available for purchase and can be installed in most vehicles. They usually come as:
- Pre-built siren units with built-in electronics.
- Standalone sound modules that can be wired to external speakers.

2. Legal Considerations Before Installing an Ecto 1 Siren
In many countries and states, it’s illegal to use certain types of sirens on public roads because they resemble emergency vehicle sounds.
Before wiring an Ecto 1 siren for your car, check:
- Local traffic laws regarding sirens and emergency sound effects.
- Whether it’s allowed for show or parade use only.
- Noise regulations in your area.
Tip: Many Ghostbusters fans keep their siren wired to a switch that they only use when parked or during events.
3. Tools and Materials You’ll Need
To wire your Ecto 1 siren for car, gather:
- Ecto 1 siren unit (replica or custom-built)
- 12V DC power source (most sirens work with standard car battery voltage)
- Relay (optional but recommended for protecting your switch)
- Inline fuse (15A–20A depending on siren specs)
- Electrical wires (14–18 gauge)
- On/Off toggle or push button switch
- Crimp connectors or soldering kit
- Electrical tape or heat shrink tubing
- Mounting hardware (brackets, screws, etc.)
- Basic hand tools (screwdrivers, pliers, wire cutters)
4. Choosing the Right Ecto 1 Siren for Your Car
When selecting an ecto 1 siren for car, consider:
- Sound Authenticity – Some replicas use original movie recordings, while others use synthesized tones.
- Power Requirements – Check voltage and amp draw.
- Speaker Output – A powerful external speaker (100W or more) ensures the sound carries well.
- Mounting Style – Some are dash-mounted; others need to be installed under the hood.
Popular brands offer plug-and-play systems, while DIY enthusiasts can build custom sound boards using audio files from the movies.
5. Step-by-Step Guide: How to Wire an Ecto 1 Siren in Your Car
Step 1: Plan the Installation
- Decide where the siren unit will be mounted (under the hood, in the trunk, or inside the cabin).
- Plan the wiring route from the siren to your switch and battery.
- Avoid running wires near high-heat areas or sharp metal edges.
Step 2: Mount the Siren or Speaker
- Use a sturdy bracket or mount to secure the siren or speaker.
- Position it so the sound projects forward (for best effect).
- Keep it away from moving engine parts.
Step 3: Install the Switch
- Choose a toggle or push button switch for easy control.
- Mount it within arm’s reach of the driver’s seat.
- If you’re doing this for events only, consider a hidden switch to avoid accidental use.
Step 4: Connect the Power
- Run a wire from your siren’s positive (+) terminal to the switch.
- From the switch, run a wire to an inline fuse (close to the battery).
- Connect the other side of the fuse to the car battery’s positive terminal.
Step 5: Connect the Ground
- Run a wire from the siren’s negative (–) terminal to a clean metal point on the car’s chassis.
- Make sure the connection is secure and free from paint or rust.
Step 6: Optional – Use a Relay for Extra Protection
- A relay helps protect your switch from high current draw.
- Wire the relay between the switch and siren following the relay’s wiring diagram.
Step 7: Test the Siren
- With the engine running, flip the switch and check the siren’s sound.
- If it doesn’t work, double-check wiring connections and fuse placement.
6. Tips for a Professional Installation
- Heat Shrink Tubing – Use instead of electrical tape for a cleaner, safer finish.
- Wire Looms – Protect wires from abrasion and heat.
- Labeling – Mark your wires for easier troubleshooting later.
- Quick Disconnect Plug – Allows you to remove the siren quickly for maintenance.
7. Maintenance & Care for Your Ecto 1 Siren
- Keep the siren and speaker dry to prevent corrosion.
- Test it monthly to ensure all wiring is intact.
- Avoid prolonged use to prevent overheating the speaker coil.
- Store the vehicle indoors if possible to protect the electronics from extreme weather.
Conclusion
Wiring an ecto 1 siren for car is a fun, nostalgic project that brings movie magic to your ride. The key is to do it safely, legally, and with attention to proper wiring techniques. Whether you’re showing off at a convention or simply enjoying the authentic sound in your driveway, your Ecto 1 siren will definitely turn heads.
Remember: Check local laws, wire it correctly with fuses and relays, and keep it for events rather than regular road use. Once installed, you’ll have your own piece of Ghostbusters history — right under the hood.
Resource URL:
https://evandesigns.com/products/ghostbusters-ecto-siren
https://en.wikipedia.org/wiki/Ectomobile

Victor Hearns is an American multi-genre writer. He is best known as the author of two series of some popular books. Victor was born in Jacksonville, FL but grew up in California with her grandmother. Her education includes degrees in English and Biology from Stanford University. In her free time, he helps people around the globe to live healthier & joyful life.